7 Colors You Should Never Choose To Paint Your Room
June 2, 2019
Mistakes To Avoid When Painting Your Kitchen Cabinets
June 2, 20196 Tips & Tricks To Paint With Hairline Cracks
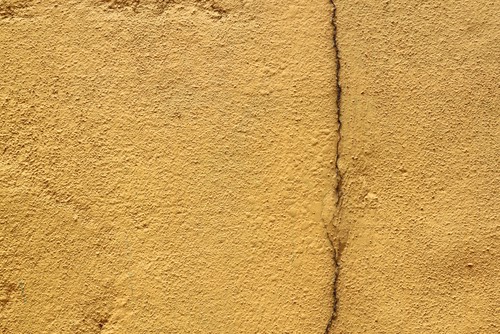
Hairline cracks are a nightmare to every painter. They are one of the most challenging phenomena that affects the work of a painter and can greatly undermine the quality of painting work. For quality painting work, it is important that hairline cracks are dealt with before painting work begins. There are many approaches, many painters can use to deal with cracks but there are simple and basic procedures that must be followed. The approach a painter uses to deal with hairline cracks will depend on many issues such as size of cracks and their location.
Hairline cracks can be caused by many problems but the main cause is poorly prepared concrete that cracks causing visible holes and cracks and holes on the walls. These cracks and holes are not only challenging to painters but they are also a source of problems to the household. A house with cracks on the walls breeds a lot of pest and insect. This is because all kinds of pests and insect find a comfortable breeding area where they cannot be seen. Cracks and holes in the wall can also harbor a lot of dust and dirt that can cause a lot ailments.
Here are tips and tricks on how to paint walls with hairline cracks:
Cleaning the surface
This is the first step to take even before you think of taking your paint brush. We all know that cracks and holes on the walls are place where all kinds of dirt and dust are hidden. Cleaning is important to avoid putting your fresh paint on a dirty surface. Cleaning may also include using a pesticide in case the wall is infested with pest and insects within the cracks. In severely affected walls it is almost obvious that you will find some insects within the walls. The method of cleaning used will depend on the type of walls and the level of dirt on the wall. Cleaning is usually done to remove loose particle of concrete and dust between the cracks and also to make the surface smooth. It is only logical to apply your paint on a clean surface.
Using fillers
Cracks and small holes are filled with fillers to make the surface even and smooth. There are different types of fillers available in the market. For instance there is the already mixed filler that is available in tubes with nozzles and there is the dry filler that is mixed with water. The type of filler you use will depend on the type of cracks that you have on the walls. For small cracks and hole, you might use the dry filler that is mixed with water and use a scrapper to fill the cracks. For larger and complicated cracks, you might require to use the already prepared filler. Some holes and cracks are too complicated so don’t be surprised when you use a second filling. This is normal because sometimes the filler might shrink after it has dried and you might require a second filling.
Making the wall smooth
Once you fill the cracks and walls with fillers, this does not guarantee that your wall is smooth and ready for painting. You still have more work of making the wall smooth and even. This is because during the process of filling some areas will jet out because of using more filler than necessary. To make the wall smooth you might require sand paper to get a smooth and even finish. Making walls smooth depends on skills and preference of the painter and there is no wrong or right way of doing it. This is where a painter’s creativity comes in and you can use many techniques to achieve a smooth surface. Using a base coat for instance in one way of doing it. A base coat usually consists of a think paint combined with fillers meant to give a smooth finish. The base coat is usually applied using a fluffy brush and this process can be done by any one because it is not a very professional procedure. The base coat is odourless and that is why many people may think it is not the actual paint.
Give the filler time to dry
This step now require patients because it is not advisable to apply paint immediately after you have applied the filler. The time required for the filler to dry will depend on many factors. For instance, if the cracks were big, then it is more likely that a lot of time will be taken before the walls are completely dry. For a base coat, it will take even more time to dry because a base coat is like ordinary paint. It is important to allow paint to dry because if you paint on wet walls the results will not come out as expected.
Inspecting the cracks
After the filler has dried, it is now time to inspect the walls and check if the surface is smooth and if the cracks have been completely filled. It is likely that you might be disappointed with the results but this does not mean that you didn’t do a good job. If you see areas that may require final touch ups and repairs, this is the right time to do them. During the inspection time you might require to be more careful because this is the final steps of filling the cracks and holes.
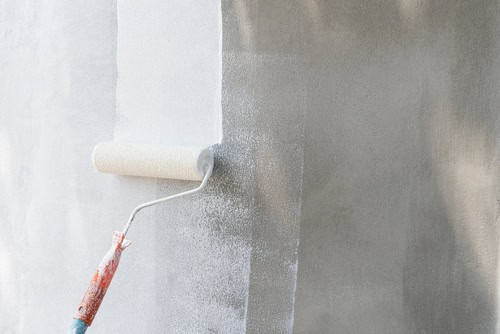
Painting
Once you are satisfied that your fillers are dry it is now time to paint your surface. Use your favorite paint and color to achieve a smooth and good finish. You will have solved the problems of cracks and at the same time you will have beautiful walls.
There are at times when using fillers to hide cracks may not be the perfect solution and you might need to look for alternative solutions. Severely affected walls may need you to take other techniques like plastering the whole walls. Plastering may be expensive and take time but it is a necessary procedure if you need to get beautiful walls. There is no need of wasting your paint on damaged walls.